
Editions
The Preservica APIs are available to Cloud Editions Essentials (CE), Cloud Editions Essential Pro (CEPro), Enterprise Private Cloud (EPC), and Enterprise Private Cloud Perform (EPCP) editions. The APIs are not available on Starter or Starter Plus editions.
The ability to add and/or edit Forms is available to specific editions. Professional and Professional Plus editions can create one additional Form. Enterprise edition customers can create unlimited Forms. Please reach out to Support (support@preservica.com) for details about your edition.
Preservica Versions
This document is valid from v7.0.
Introduction
In the New Gen interface, metadata setup has been simplified with Groups and Forms, while still maintaining the power of Schema management. To that end, this document is written with the assumption that you have reviewed the NewGen Professional Metadata Management training resources. And if you are a dual running (Classic and NewGen) user, that you have reviewed the Dual Running training resources. Finally, this document outlines how to create and update forms via Preservica’s APIs so some familiarity with APIs would be helpful but is not required.
API Resources
For beginners, Preservica’s APIs are accessible via a Swagger page - https://demo.preservica.com/api/documentation.html. This allows users to test individual APIs before implementing as a part of larger automated processes. In this document the URL “demo.preservica.com” will be used as an example Preservica system. Replace “demo” with your Preservica instance name in all examples throughout this document to view and access the APIs and API documentation for your Preservica instance.
Preservica’s APIs can also be accessed via an API platform like Postman. There are external resources available to support API use via Postman.
Getting an access token
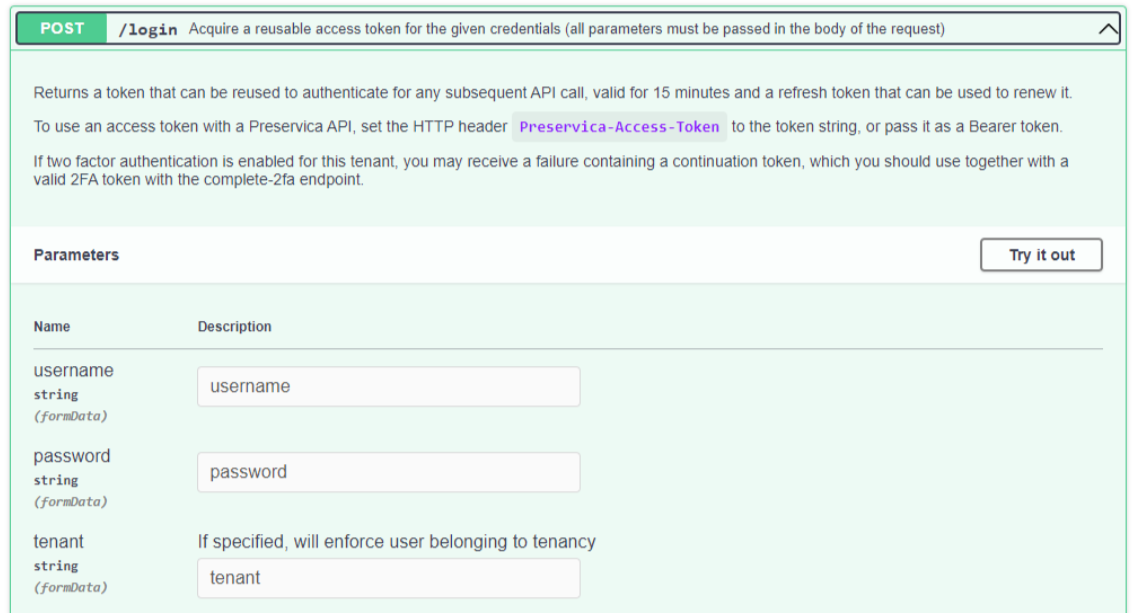
To use the /metadata API endpoint, you must get an access token. This can be achieved via the POST /login endpoint (demo.preservica.com/api/accesstoken/documentation.html#//post_login). If using Swagger, select Try it out and enter a relevant username, password and tenant name:
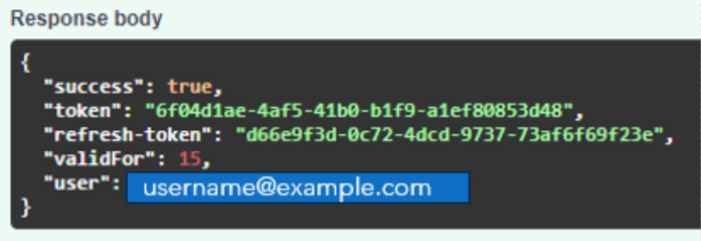
Press Execute and the response will include a viable access token:
On the /metadata endpoint page in Swagger (https://demo.preservica.com/api/metadata/documentation.html), select the Authorize button in the upper right hand corner of the page and paste the access token into the available space:
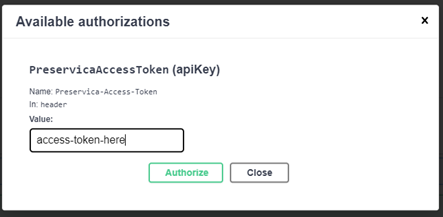
Select Authorize.
Now that you have been authenticated you can complete the next steps for creating or updating a Form.
Create a Form for Classic Interface metadata
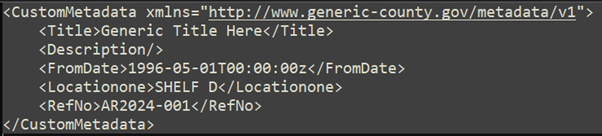
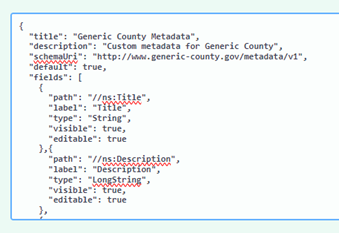
For schemas set-up via Schema Management in the Classic Interface, a Form can be created to display and allow manual edits to metadata in New Gen. For example, if metadata in the Classic interface looked like this:
Then the following JSON would allow this metadata to be viewed and edited in New Gen:
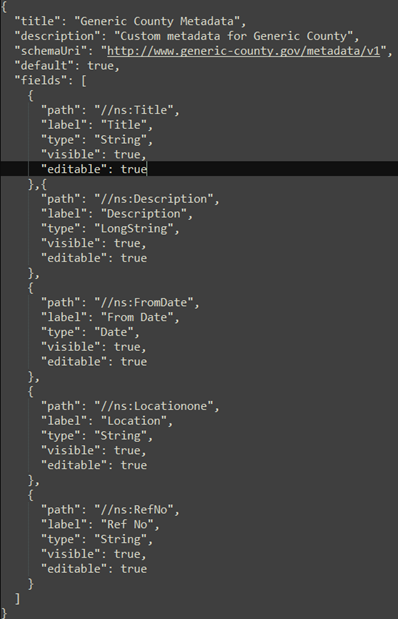
Note: Forms for metadata set up in the Classic Interface will not add new fields to the existing XML. So if the metadata doesn’t exist in the Classic Interface then the Form will not display it or allow edits in New Gen.
Lets review parts of this Form.

The top part of the Form includes the title, description, schemaUri, and default information. These key/value pairs need to be in proper JSON format. The title and description are free text and will be displayed via the UI when on the Metadata Forms page in New Gen. The title will be displayed when the Form is selected for a folder or asset.
The schemaUri value should match the xmlns value in the XML set up in the Classic Interface.
The default field is a Boolean true/false option. There can only be one “default: true” Form within a single New Gen system.
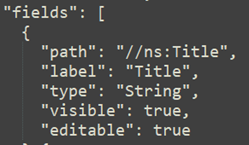
Next, the fields section of the Form lists the specific metadata elements of the Form. For each metadata element in the Form there should be a path, label, type, visible and editable value.
The path value is the xpath to identify the specific metadata element within the XML. It should include “ns:” as a prefix unless the corresponding XML has its own prefix (ie. for Dublin Core, that would be “dc:” as the prefix, as within dc:title).
The label value is a free text option that will display within New Gen for the metadata element. The label can be alphanumeric, and the only special character allowed is the underscore (_). Special characters such as ~,/,&,^,%, ), etc., are not allowed.
The available type values include String, LongString, Number and Date. This will impact how the metadata element is indexed if there is not an existing indexer in the Classic Interface. Additionally, within New Gen a “Date” type value displays the date picker when editing the metadata.
The visible field is a Boolean true/false option. If “true” then the metadata element will appear in New Gen. If “false” then that metadata element will not appear in New Gen.
The editable field is a Boolean true/false option. If “true” then the metadata element will be able to be edited via New Gen. If “false” then the metadata element will not be able to be edited via New Gen.
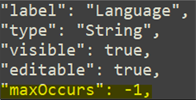
Two additional available fields include maxOccurs and allowableValues.
The maxOccurs field controls whether multiple values are allowed. Set a field to accept multiple values by setting maxOccurs to “-1”. This configuration permits users to add an unlimited number of values to a metadata field. Setting the maxOccurs value to “1” permits the user to only add one value to a metadata field.
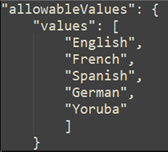
The allowableValues field is used to create a drop-down list of values. Add the desired values to the allowableValues field, separated by a comma:
After creating the appropriate Form for metadata set up in the Classic Interface, follow the steps to add that Form to your system via the POST /forms endpoint.
Add a Form via APIs
When the Form for metadata set up in the Classic Interface is ready to be added to your Preservica system, go to the POST /forms endpoint (https://demo.preservica.com/api/metadata/documentation.html#/%2Fforms/post_forms ).
After selecting Try it out, paste the Form JSON into the available field:
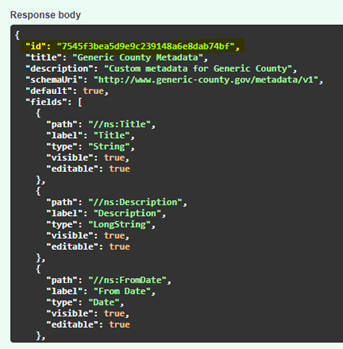
Press Execute. If successful, the response will include the id of the new successfully added Form in your system:
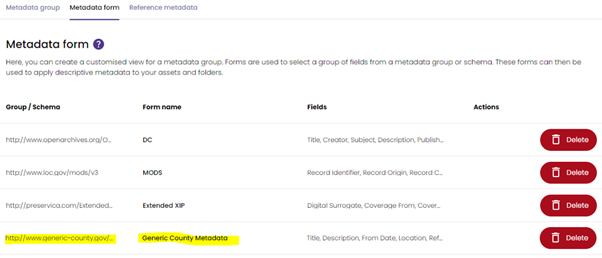
Log-in to New Gen and navigate to the Actions > Metadata management > Metadata form page and the new Form will now be listed and available to edit via the UI. If you are already logged in when submitted the API call, you may need to refresh the page to see the newly added Form.
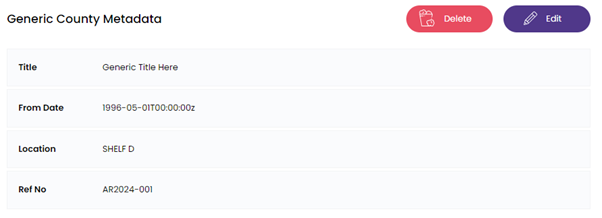
Additionally, navigate to an asset or folder that has the relevant metadata and check to make sure the metadata is visible in New Gen:
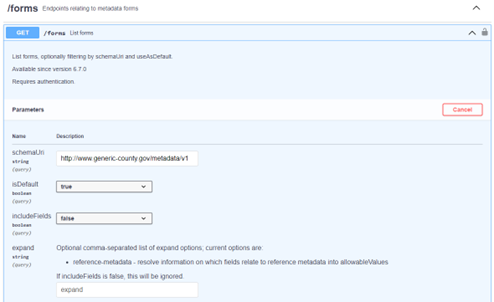
Update Form via APIs
To update an existing Form within your system, first use the GET /forms endpoint to get the Form id. There is the option to narrow results by adding the schemaUri or changing “isDefault” to true:
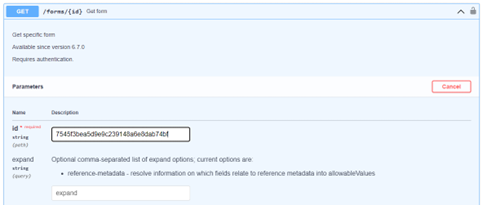
Next with the Form id, use the GET /forms/{id} endpoint to retrieve the whole JSON document.
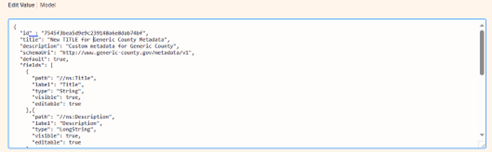
Download the JSON from the above response and save locally. Make any edits to the Form.
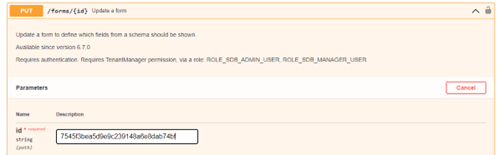
Finally update the Form using the PUT /forms/{id} endpoint. Add the Form id to the id field:
And copy/paste the Form into the text field:
Press Execute.
If successful, the newly updated Form will appear in the response body. Refresh the New Gen UI and review the Form or metadata applied to an asset.
Additional Resources
Preservica APIs
Swagger - https://developers.preservica.com/documentation/swagger-1
API Reference - https://developers.preservica.com/api-reference
New Gen Metadata
6.12 Release Notes - https://community.preservica.com/release-notes-77/preservica-6-12-0-release-notes-december-2023-2116
Public Training course schedule and recordings for Professional NGI - https://community.preservica.com/training-73/public-training-course-schedule-and-recordings-for-professional-ngi-2166
Dual Running training videos - https://community.preservica.com/training-73/dual-running-training-videos-2249
Attachments
example_classic_metadata.xml
example_form_for_classic_metadata.json
Note: For the attachments, rename the .txt file to .json
